IP Address Change
If you’re changing the static IP address at your head office, and your remote locations point to that address (not a VPN configuration), you’ll need to take the following steps on each remote site computer depending on the role.
Back Office
For workstations running Back Office:
- Exit out of Back Office (probably won’t be running anyway);
- Using Windows Notepad, edit the \ARALCO\BOS\ARALCO.INI file. It should look something like this:
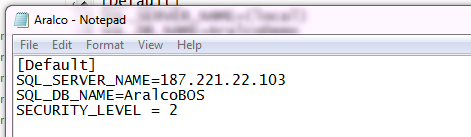
- Change the IP address beside SQL_SERVER_NAME to the new static IP address, and save the changes.
- Alternatively, if you know the IP address in advance, you can add another entry (similar to the following) to the \ARALCO\BOS\ARALCO.INI file.
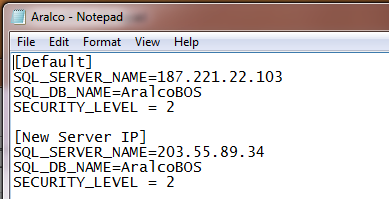 When starting the Aralco Back Office it will prompt you with the option to connect to the Default (current) or to the New Server IP.

Once the new IP address takes affect you’ll want to select Default, and use the Remove Connection button, so that only the New Server IP connection is available.
When there is only one entry in the ARALCO.INI file, you will no longer be prompted with this window.
Point of Sale
For workstations running Point of Sale:
- Login to Point of Sale;
- On the bottom Windows Task Bar right click on the